How to make your nose look sharper with Contouring
How to make your nose look sharper
So one thing that I always hear when I’m doing makeup is how to make your nose look thinner and today I’m going to give you tips on how to make your nose look sharper with contouring.
Contouring Your Nose
So the first step would be to highlight.
I’m using YSL Touche Eclat today.
What you do, take a little pump.
I’m going to put a little bit down the top of my nose.
So this is highlighting the top and later we’re going to go back with contour, and the combination of the two is what thins the face and will give it a little bit of that illusion that it’s thinner and more precise.
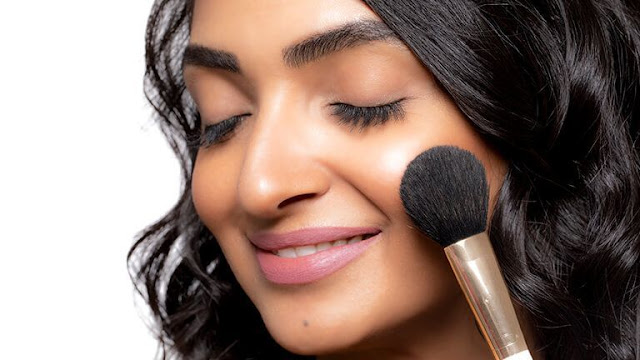
So as you can see, I’m just tapping this on right now.
 |
| Image Credit - Myglamm |
You can use a brush if you want.
So don’t be afraid to kind of get right in there.
Tap it all down.
Make sure it’s blended and looks very flawless.
I love the Touche Eclat because it’s very light.
It highlights but it’s not too heavy, and especially when you’re doing contouring you
don’t want anything that’s going to look cakey or throw off the effect.
Because you’re already doing something that unnatural by creating an illusion of more contour than what you really have on your face.
So you want it to look very flawless.
So now that the top of my nose is highlighted, I’m going to go back and what I use for contour today is a Manish Malhotra Foundation Stick.
Now, as you can see, this is definitely too dark.
I wouldn’t use this for foundation, and I did that on purpose.
What you are doing is you would like to settle on a shade that’s either three or more shades darker than your natural skin tone, and you would like to make sure that the tone may be a cool tone instead of a warm tone.
If you’re using a warm tone when you’re contouring, it’s going to end up a little bit too orangey, maybe terracotta-coloured, so definitely cooler.
This colour is Almond #7.
What I’m going to do is take a concealer brush.
I’m going to use a little bit of this.
I’m loading both sides of the brush.
This foundation stick is really nice because it blends very well and it’s easy to use.
 |
| Link: https://in.pinterest.com/pin/448671181625392238/ |
bridge of your nose
What I do, an easy way to do a contour on the nose is simply quite take the brush right during this nape of the nose right here, you see I made the mark, and just do a bit flick like that.
So this is often a really easy, everyday kind of contour.
It’s not getting to be that dramatic, but I’ll undergo and show you a more dramatic version if you actually want to slim.
So I’m getting to do the small flick on the opposite side.
This is very simple.
Blend
No one will really notice this one if you do it on a daily basis and what I’m doing, as you can see, is just blending the contour downwards.
So now, if you want to do something that’s a little more intense, what I’m going to do once again, load the brush and I’m actually going to line the entire side of the nose, very thin.
It’s going to look pretty dramatic at first, as you can see.
You wouldn’t want to walk around like this.
Then I’m going to take the brush and blend this downwards.
The line that you’re doing is kind of like where the brow ends down to that nape of the nose where we did the little flick earlier, and we’re blending.
Like I said, downward blend, make sure it looks very natural.
What you’ll do since this is often a little more dramatic and you do not want it to seem very obvious, you’ll take a sponge that perhaps includes a little bit of foundation or something else on that, and sort of cap it down so it’s a touch more natural.
 |
| Image Credit - Myglamm |
Make sure that it looks flawless.
So, next, we’re going to do the other side.
Make the line pretty straight and make sure that it’s pretty flawless there, and you can even take it a little bit up towards the brow too if you want.
Once again, blending downwards, making this line more precise, and now back with the sponge.
There you have it.
That’s how to make your nose look sharper
Click Here for More...

Comments
Post a Comment